Creating JoggrDocs
This guide will walk you through how to create JoggrDocs. This includes instructions on how to do the following:
- How to use Code Snippets and Code Links, so that Joggr can automatically maintain all of your docs for you.
- How to create pull requests and review your documentation just like you do code.
Tip: If you want to learn more about Code Links and Code Snippets, visit our Platform Docs.
Select a Template
When creating a document, you can start with a blank document or use a template. Using a Joggr template is not a requirement, but we highly recommend using one of our templates to help you create documentation quicker and keep all of your documentation in a consistent format.
Once you’ve chosen your template, click “Create Document” to start your JoggrDoc.
Missing a template? Please reach out to the Joggr Team in slack or send us a note at support@joggr.io and we will add this template to your workspace.
Add Content
Now you are ready to start adding some content. We only require three things to save a document:
- Title: The title of your document.
- Content: This can include Code Snippets, Code Links, text, images, tables, or (mermaid) diagrams.
- GitHub Location: The location in your GitHub repository where you want to save your document.
We’ve also included a few of the core features (marked as “Optional”) that will help you create rich technical documentation, such as Code Snippets, Code Links, tables, and diagrams. Add these features as you see fit.
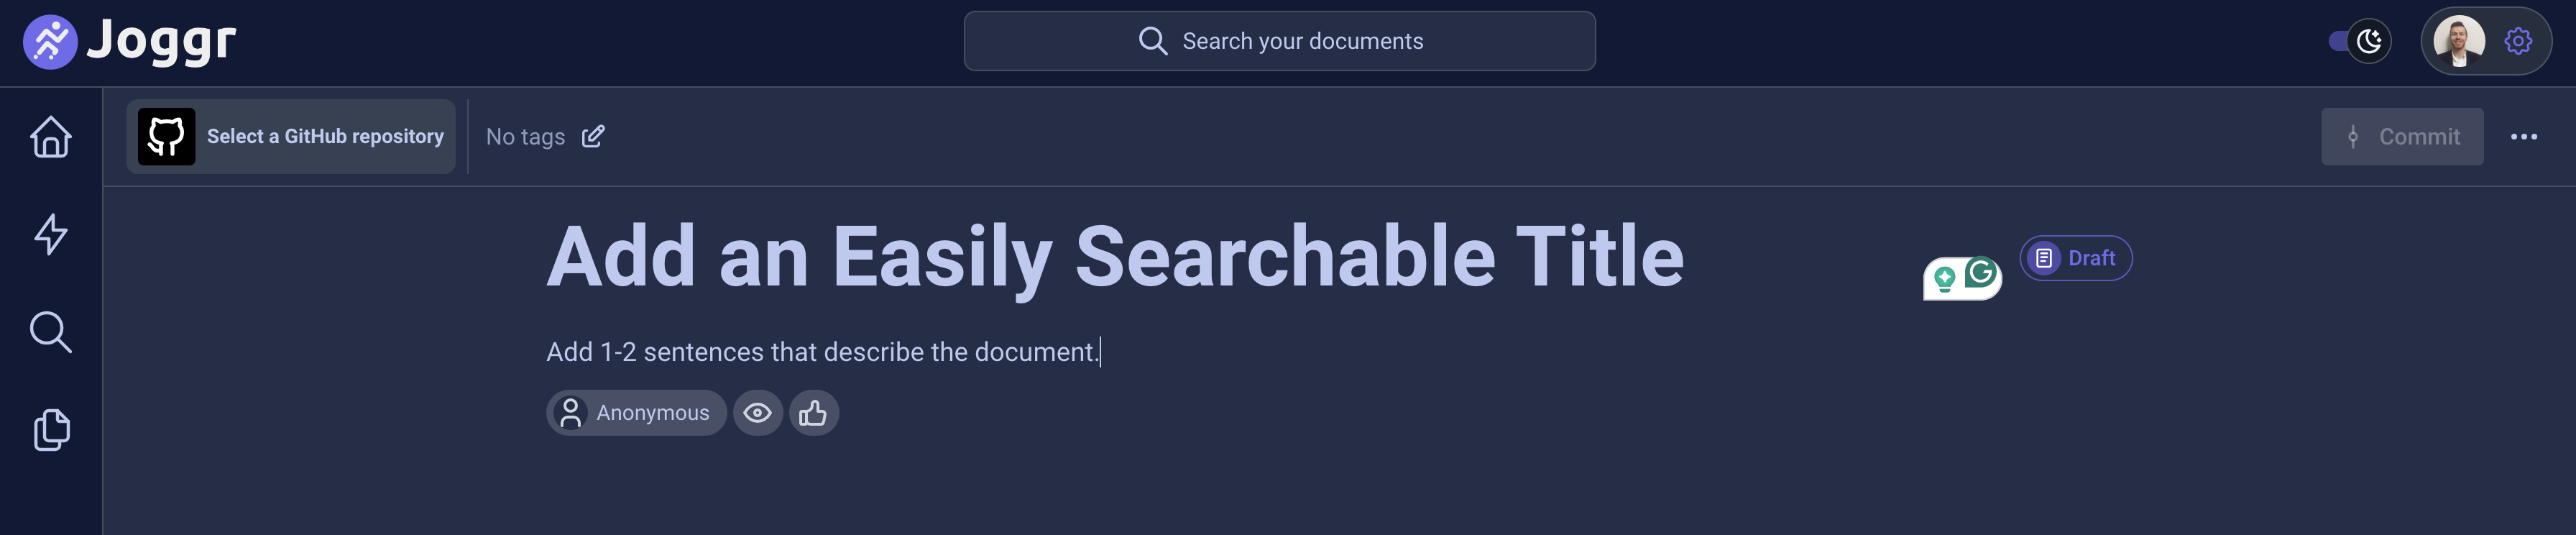
Add a Title & Summary
When you search for documentation in Joggr, Joggr’s search algorithm looks at a document’s title, summary, and content. Add an easily searchable title and summary to make the discovery of documentation quick and easy.
We recommend that you create naming conventions for documentation just like you do with your code. For example, you could create a documentation standard where all titles of ‘how-to’ guides must start with ‘How To…’.” If you need help creating documentation standards, please reach out on slack or send us a note at support@joggr.io
Add a Code Snippet (Optional)
The best technical documentation has the right balance of text, visuals, and examples from your codebase. Use Joggr’s Code Explorer to pull in a Code Snippet from your codebase.
Visit our docs on Code Snippets to learn how we keep these code snippets up to date with your codebase.
Add a Code link (Optional)
The best technical documentation has the right balance of text, visuals, and examples from your codebase. However, sometimes you might not want to directly reference code in a document, even though there is a relationship between the document and code. That’s why we built Code Links!
Code Links allows you to link a document to a file in your codebase without directly referencing the code in your JoggrDoc. If any code in that file changes, Joggr will notify you in the pull request that this documentation is out of date.
Visit our docs on Code Links to learn more and to review examples on where this can be used.
There are several limitations at the moment, see below:
- You can only add Code Links to the latest version of a document: This means that you cannot add Code Links on documents until they are merged to the default branch. If you want to add a Code Link to a version of a document that is in Pull Request, please wait until it’s been merged.
- Code Links do NOT go through Code Reviews: as soon as you click the Link Entire File button, the code link is added (aka it’s saved to our DB). Code Links are NOT reviewed in GitHub at the moment, but we have plans to add this.
Add a table (Optional)
In Joggr, you can easily create complex markdown tables using Joggr’s WYWSIG editor.
Add a Mermaid Diagram (Optional)
Joggr natively integrates with Mermaid, so you can create diagrams directly from Joggr. Use our pre-built templates to get started!
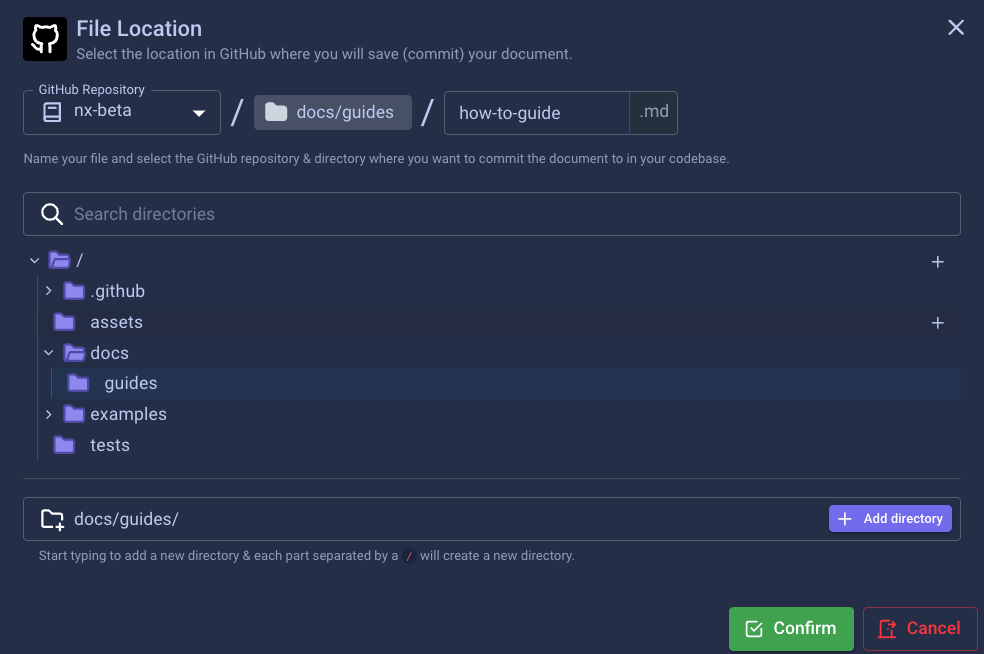
Choose GitHub Location
JoggrDocs are created in Joggr’s Web Interface and saved to your GitHub repository as markdown files. When creating a JoggrDoc, you must select a GitHub location to save your document. In the top-left of your document, click the Select GitHub Repository button and the modal below will appear. Choose where you want to save your document and click “save”. Documents are saved to /docs by default.
We recommend that you create a separate repository for documentation that does not apply to a single repository. For example, if you are documenting your Code Style Standards, this applies to all repositories and code.
Open a Pull Request
Congrats, you are now ready to save your JoggrDoc!
At Joggr, we believe you should create and review documentation just like you do code. When saving a JoggrDoc, you have three options:
- Create a Pull Request in Joggr: Create a pull request directly from Joggr and review your docs like you do code. If you’re not quite ready for a review, click the Create as a draft button to make the pull request a draft.
- Commit to an Existing Pull Request: Commit to any existing pull request in GitHub. Use this option when you’ve already opened a pull request and would like to add documentation to the PR.
- Default Branch: Save to your default branch (e.g. main). We recommend you only use this as a last resort, because reviewing documentation like you do code ensures better knowledge transfer and higher quality documentation.
Keep Jogging!
You’ve created your first JoggrDoc, congrats!! If you have questions or run into issues, don’t hesitate to reach out to our team on Slack or send us a note at support@joggr.io